

Setting Your Environment in MyEclipse for PhoneGap Builds
Before building PhoneGap application files for device testing and distribution in MyEclipse 2015, you must do a few things to prepare your environment. The requirements for Android and iOS are slightly different and some setup depends on if you are building remotely using the PhoneGap cloud build service or building locally. This tutorial walks you through the required setup for each scenario. You will learn how to:
- Create a Signing Profile
- Enter credentials for remote builds
- Set up for local builds
Note: Mobile development was removed in MyEclipse 2016. This tutorial only applies to MyEclipse 2015.
1. Create a Signing Profile
Before creating your signing profile, you need to have required digital signing certificate files for iOS and/or Android. See Setting Up Required Provisioning for iOS Applications for information on acquiring iOS certificates and Generating Self-Signing Certificate Files for Android Apps.
- Select Window>Preferences.
- Expand MyEclipse>Mobile Tools, and select Signing Profiles.
- Click New to create a new signing profile.
- Complete the fields for the new profile, and click OK.
The certificate and private key files must be a matching pair. The certificate file you select must be the one created by the .csr file that was generated at the same time as the private key file.
If you have a .p12 identity file that was created on a Mac, you can use this file instead by selecting the PKCS #12 File option.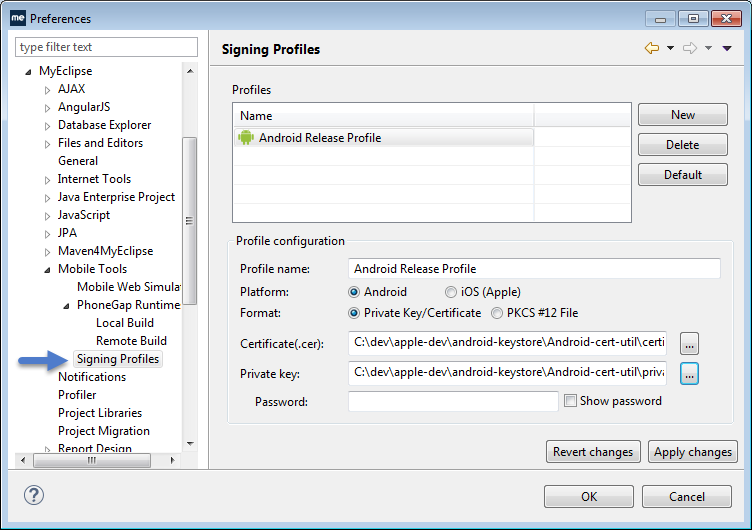
Managing mobile signing profiles
Android Provisioning Note: For Android development testing, you are not required to use digital signing files.
iOS Provisioning Note: The provisioning profile should match the distribution method you plan to use. If you are distributing using the Ad Hoc method, you must select a profile for ad hoc distribution. If you are distributing via the App Store, select a profile for App Store distribution. It is helpful to name your profiles so they are easily identified by the distribution method, e.g. xxx-adhoc, xxx-appstore.
2. Enter Remote Build Credentials
- Select Window>Preferences.
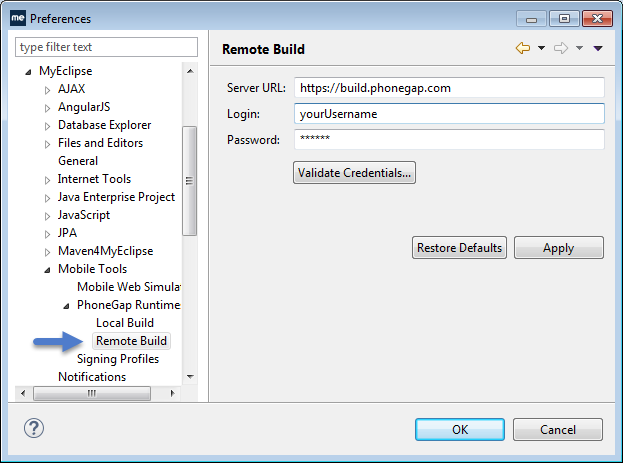
- Expand MyEclipse>Mobile Tools>PhoneGap Runtime, and select Remote Build.
- Enter your PhoneGap Build account credentials.
- Click Validate Credentials, and click OK.
PhoneGap Build account configuration
3. Set Up for Local Builds
Local builds provide more flexibility for larger applications than using the remote PhoneGap Build service. However, there are a few more restrictions regarding local builds. The specific requirements depend on your operating system and the platform for which you are building apps.
3.1 Installing the Android SDK
You can build Android apps locally on both Windows and Mac systems. To do so, you must have the Android SDK installed.
- Download and install the Android SDK.
- After the initial installation, follow the instructions provided for installing additional required packages via the SDK Manager.
- To complete requirements for building in MyEclipse, install all items found in the Android 4.4.2 (API 19) folder (with the exception of the Glass Development Kit Preview).

Installing the Android API 19 - In MyEclipse, select Window>Preferences.
- Expand Mobile Tools>PhoneGap Runtimes, and select Local Build.
- Browse to the location in which you installed the Android SDK.

Specifying the Android SDK location - Click OK.
3.2 Installing XCode on Mac
To build iOS mobile apps locally, you must use a Mac system. The Mac must have XCode installed. Download and install XCode to prepare for building iOS apps locally.