

Working with Database Tables, Foreign Keys, and Indices
Database Explorer tools provide a number of wizards and actions that make it easy to create and delete database tables, relationships, and indices. In this tutorial, you will learn to:
- Create and drop a table
- Create and drop foreign key
- Create and drop an index
This feature is available in MyEclipse.
1. Creating a New Index
Creating an index can be an important performance tool for developers. DBMSs typically create indices on keys in database tables. However, there might be other fields that are used regularly in ORDER BY or WHERE clauses that require an index as a performance enhancement. For example, suppose you do a lot of ordering on the CITY of the customers. You could create an index on that field.
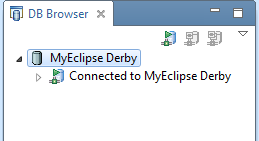
- Open a connection in the DB Browser view to the built-in MyEclipse Derby database.
Verifying the connection is established - Expand the connection, right-click the CUSTOMER table, and select New Index.
- Type city_idx in the Index name field, and click the Add button to add the columns that belong to the new index.
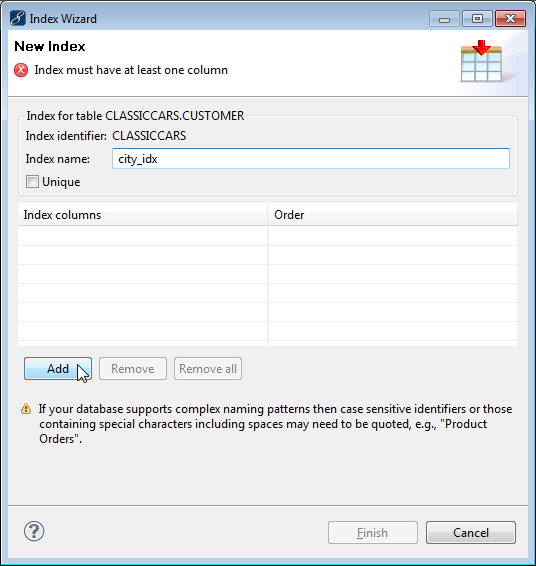
Creating a new index - Click the first cell in the Index Columns list, click the drop-down arrow, select CITY, and click Finish.

Selecting the index column - On the Table/Object Info view, click the Indexes tab to see the new index.
1.1 Dropping an Index
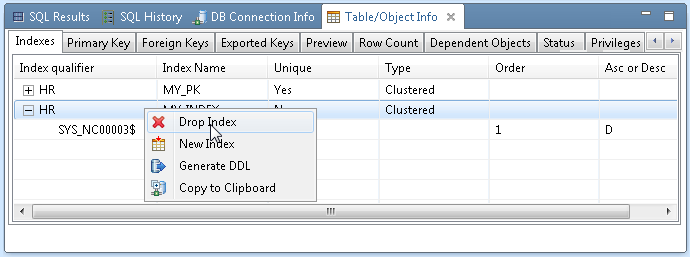
- Select the table containing the index in the DB Browser.
- Click the Indexes tab in the Table/Object Info view.
- Right-click the index you want to delete, and select Drop Index.
- Click OK to confirm the drop.
Dropping an index
2. Creating New Database Tables
During design, a developer of a database-enabled application models the domain of his application and creates corresponding tables within which he can persist the application’s data. Add a new table called CUSTOMER_RELATIONSHIP that represents a pair of customer numbers that are related in some way.
- Right-click TABLE in the DB Browser, and select New Table.
- Type CUSTOMER_RELATIONSHIP in the Table name field.
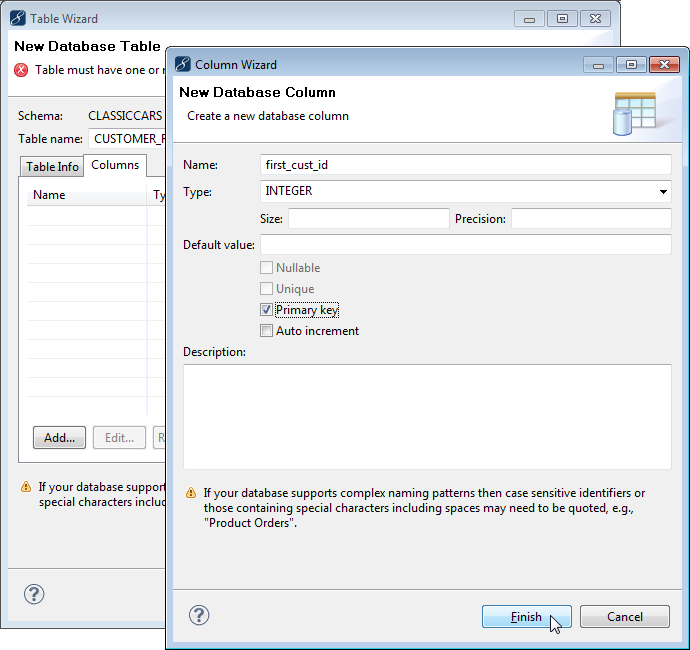
- Click the Columns tab, and then click the Add button to add columns to the table. You are adding two customer id columns that represent two related customer numbers.
- Type first_cust_id in the Name field, select INTEGER from the Type drop-down, select the Primary key checkbox, and click Finish.
Adding a table column - Use the same steps to add another column named second_cust_id.
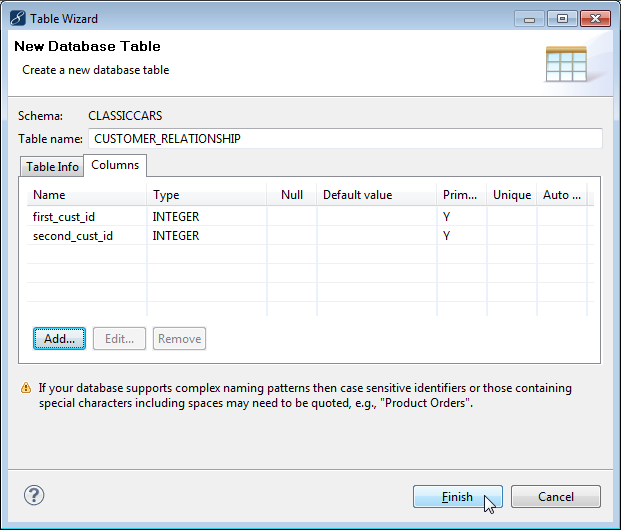
Completed table - Click Finish to create the table. The table appears in the tables list in the DB Browser.
2.1 Dropping Database Tables
- Right-click the table you want to drop, and select Drop Table.
- Click OK to confirm the drop.
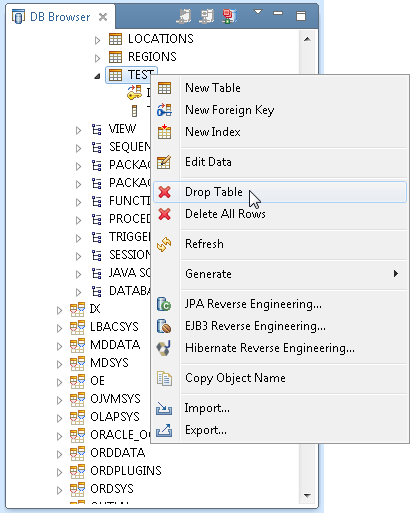
Dropping a table
3. Creating a New Foreign Key
Now that you created the CUSTOMER_RELATIONSHIP table, make both the new fields foreign key references to the CUSTOMERNUMBER field of the CUSTOMER table. This is necessary because for two customers to have a valid relationship, they both have to be valid customers, and that dictates that they need to be represented by records in the CUSTOMER table.
- Right-click CUSTOMER_RELATIONSHIP in the DB Browser, and select New Foreign Key.
- Type first_cust_fk in the Foreign key name field.
- Click the first cell in the Foreign key columns, click the drop-down arrow, select first_cust_id, and click Finish.
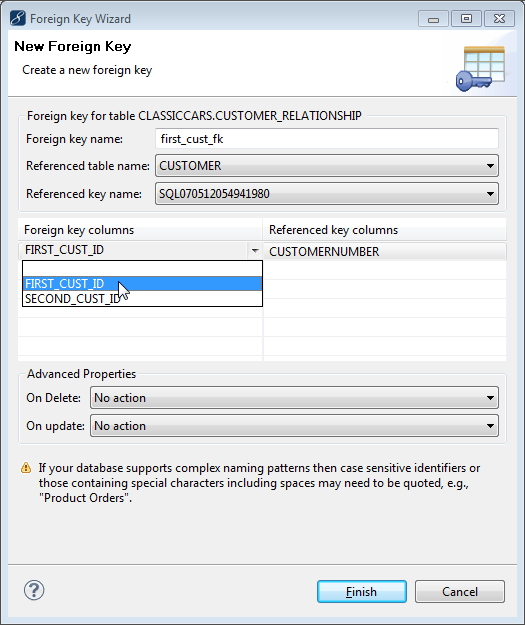
Adding a foreign key - Follow the same steps to create a second foreign key called second_cust_fk that references second_cust_id.
- In the Table/Object Info view, select the Indexes tab to view the new foreign keys as indexes.
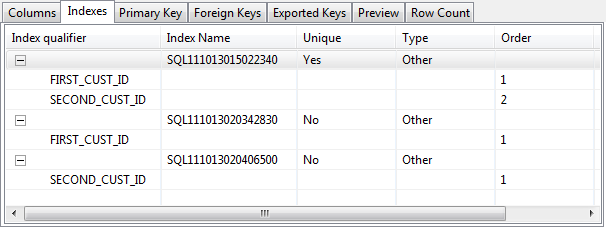
Foreign keys on the Indexes tab
3.1 Dropping a Foreign Key
- Select the table containing the foreign key in the DB Browser.
- Click the Foreign Keys tab in the Table/Object Info view.
- Right-click the foreign key you want to delete, and select Drop Foreign Key.
- Click OK to confirm the drop.
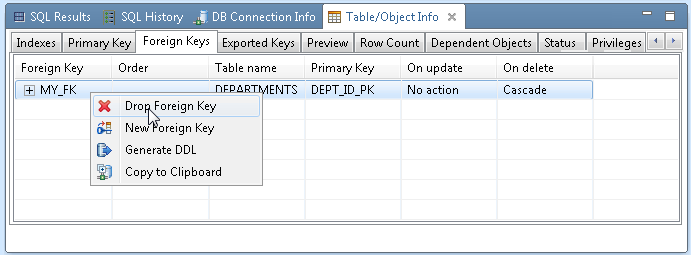
Dropping a foreign key