

Using JSF for Web Applications
This tutorial walks through a JSF demo login application using MyEclipse. Previous knowledge of JSF and/or MyEclipse is not necessary, but is helpful. In this tutorial, you will learn how to:
- Create a web project with the JSF facet
- Create a message bundle for storing all messages and associated keys
- Create a managed bean that performs a login operation
- Create JSP pages
- Connect JSPs with a navigation rule
- Deploy and Test the application
This feature is available in MyEclipse.
1. Create a Web Project with the JSF Facet
Because Struts is such a prevalent web application framework, similarities between JSF and Struts are noted, where appropriate, to help those with previous Struts experience.
You can download the completed sample project, if you prefer.
- Click the drop-down arrow
 , and select Web Project.
 - Type JSFLoginDemo in the Project name field, and click Finish.
Note: This tutorial uses the default JavaEE 6 version; however, JavaEE 7 is an available option when creating new projects.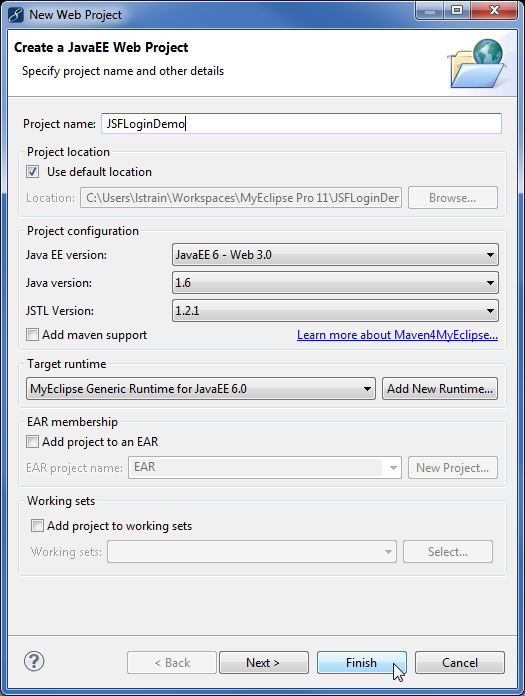
Creating a Web project - Right-click the project, and select MyEclipse>Project Facets>Install JavaServer Faces Facet.
- Accept the default values on the first page, and click Next.
- Select Mojarra 2.1.6 from the JSF Implementation drop-down, and click Finish. Advanced users can perform additional configuration by changing the default settings.
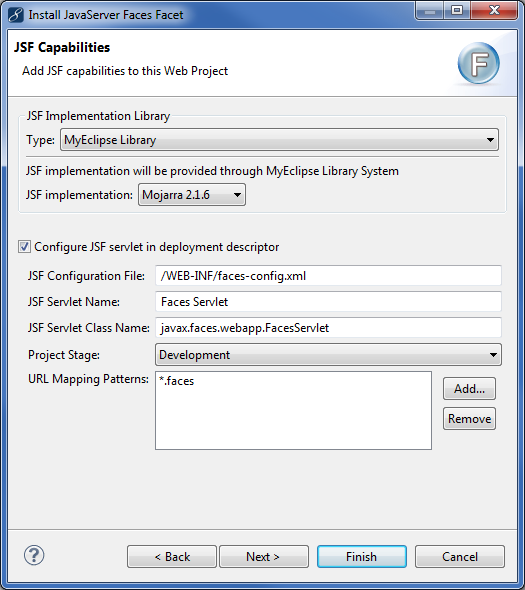
Configuring the JSF facet
Notes:
- JSF 2.0 and higher does not require the faces-config.xml file. Regardless, the file is generated in the project and can be used for configuration.
- The Project Stage drop-down adds a `param-value for javax.faces.PROJECT_STAGE` to web.xml. When the stage is set to Development, XHTML changes are hot sync’ed with the deployed project. In Production stage, hot sync is disabled. If no project stage is defined, no hot sync is available at runtime.
2. Create a Message Bundle
The MessageBundle file is a property file that stores all messages along with their associated keys. The bundle can be used in any of the JSP pages to allow the application to be internationalized easily.
Struts provides similar support with the ApplicationResources.properties file, the various `<bean />` tags, and the message bundle attributes the bean tags accept.
In JSF, you can load a message bundle into a page with the line:
 <f:loadBundle
     basename="com.jsfdemo.MessageBundle" var= "bundle"/>
Note: This line of code creates a page-scoped message `bundle` that can be referenced later in the page via the bundle variable name, use to lookup messages keys, and return the associated message value.
- Expand the JFSLoginDemo project, right-click the source folder, and select New>Package. The package is the container for the message bundle file.
- Type com.jsfdemo in the Name field, and click Finish.
- Right-click the com.jsfdemo package, and select New>File. Type MessageBundle.properties in the File name field, and click Finish. The message bundle file opens in the editor.
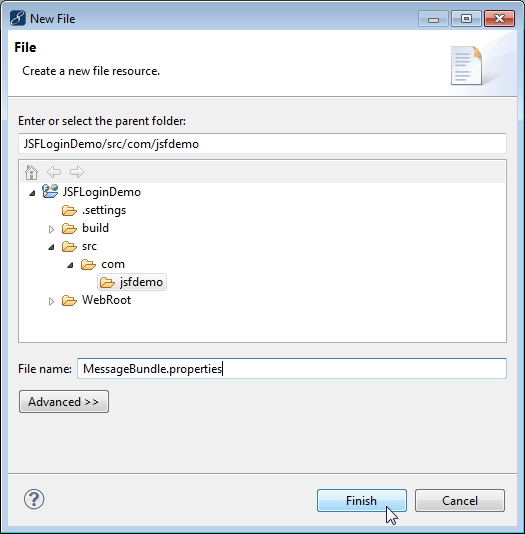
Creating a new file - Click Add, and enter the following values in the message bundle file. After entering the values, press CTRL+S to save.
| Name | Value |
| `user_name_label` | `User Name:` |
| `user_password_label` | `Password:` |
| `login_button_label` | `Login` |
These values will display in the JSP page.
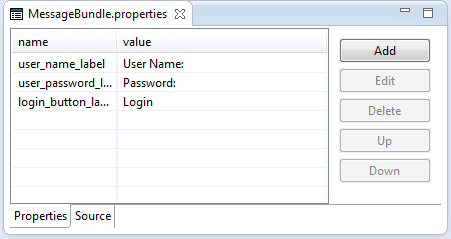
Contents of MessageBundle.properties
3. Create Managed Beans
Create a ManagedBean that performs the login operation when prompted by the login JSP page and stores the user name and password entered by the user. For this tutorial, the login operation checks if the username and password are both “myeclipse” and then redirects the user to the userLoginSuccess.jsp page. Otherwise, it returns to the login page.
Note: In JSF 2.0 and higher, managed beans can be configured using the `@ManagedBean` annotation in the Java class, rather than in the faces-config.xml file.
- Expand WebRoot>WEB-INF, and double-click the faces-config.xml file to open in the JSF editor.

Opening faces-config.xml file for editing - Click the ManagedBean tab a the bottom of the editor.
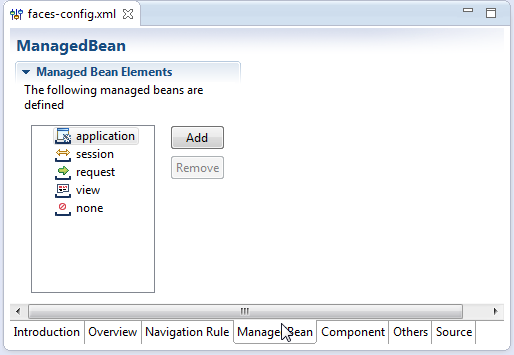
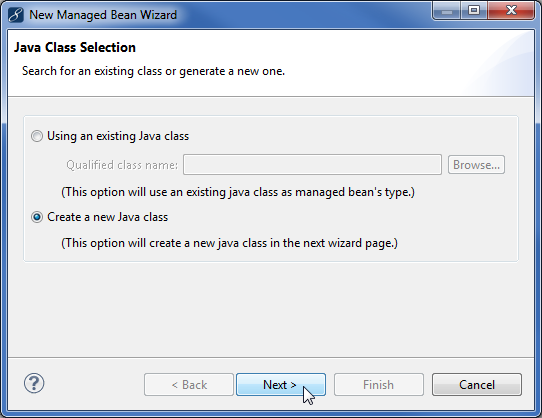
Launching the managed bean configuration - Click Add, select the Create a new Java class option, and click Next.
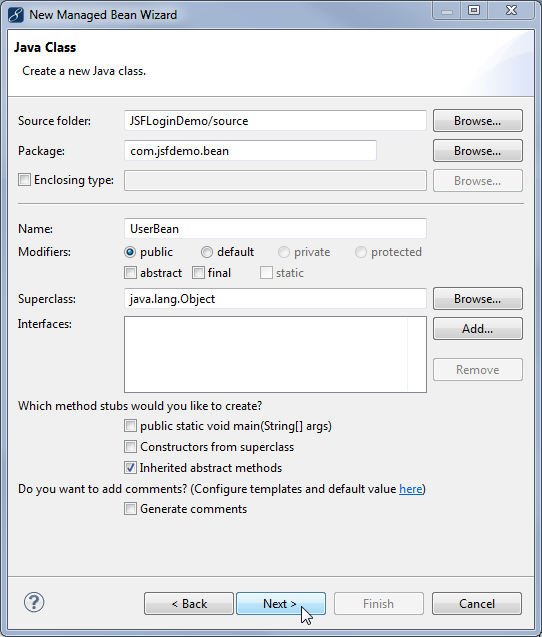
Creating a new managed bean Java class - Type com.jsfdemo.bean in the Package field, and UserBean in the Name field. Click Next.
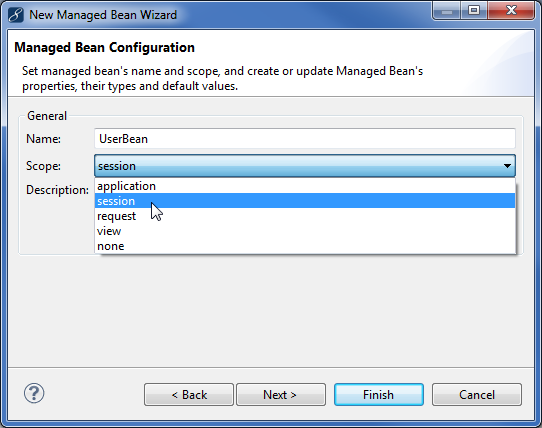
Creating a new managed bean - Capitalize the default name – UserBean. Select session in the Scope drop-down, and click Finish. Press CTRL+S to save.
Setting managed bean scope - Expand com.jsfdemo.bean in the Explorer, and double-click UserBean.java to open it in the Java editor.
Opening UserBean Java source - Copy the loginUser method below, and replace the default code in the file. Press CTRL+S to save.
package com.jsfdemo.bean;

public final class UserBean extends Object {
    private String password;
    private String userName;
    public UserBean() {
      super();
      // TODO Auto-generated constructor stub
   }

  /**
   * @return Returns the password.
   */

   public String getPassword() {
     return password;
   }

   /**
    * @param password The password to set.
    */

   public void setPassword(String password) {
     this.password = password;
   }

   /**
    * @return Returns the userName.
    */

   public String getUserName() {
     return userName;
   }

    /**
     * @param userName The userName to set.
     */

   public void setUserName(String userName) {
     this.userName = userName;
   }


  public String loginUser() {
     if("myeclipse".equals(getUserName()) && "myeclipse".equals(getPassword()))
    return "success";
    return "failure";
  }
}
Looking at the bean code, notice some unique properties about it. For example, the UserBean class doesn’t extend or implement any classes or interfaces tied to JSF. It is simply a javabean that includes the additional logic to perform a useful operation. In Struts terms, it contains all the functions of a Struts Form and a Struts Action, conveniently located in one class.
Another thing to note is that unlike Struts, these methods do not return special classes, like an ActionForward, because navigation is specified externally in a declarative fashion in the faces-config.xml deployment descriptor.
4. UserBean configuration
- In faces-config.xml, click Add in the Initialization area to add a new property.
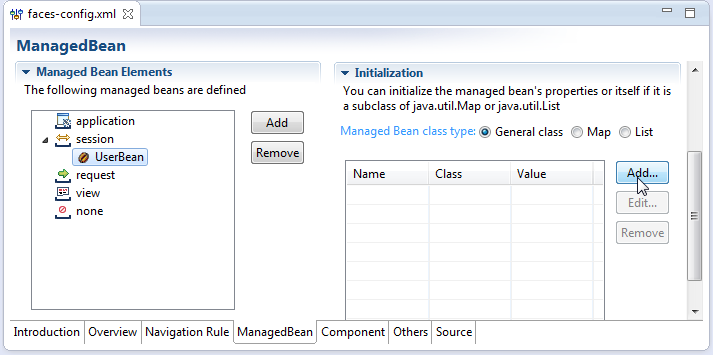
Managed bean editor - Type java.lang.String in the Property class field, select password from the Property name field, and click OK. The new property is added to the properties list.
Adding managed bean properties - Click Add again, and create a property named userName. Press CTRL+S to save the file.
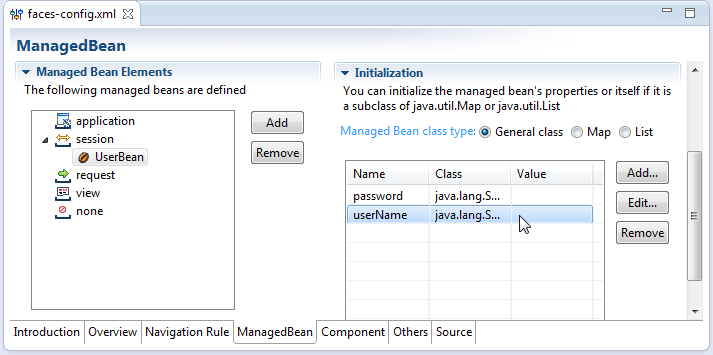
UserBean configuration
5. Create JSP Pages
Two JSP pages are required for this example, one to prompt the user to login and the other to indicate that login was successful. These pages are called loginUser.jsp and loginUserSuccess.jsp, respectively.
For simplicity, if there is an authorization error during the login attempt, the application redirects the user to the loginUser.jsp page. To avoid confusion, there is no validation in this demo, but you can add validators to the two inputText/Secret JSF components. These fields are used to validate the user’s entry for length and additionally display an error message if the login is incorrect.
- Right-click the WebRoot folder, and select New>JSP (Advanced Templates).
- Type userLogin.jsp in the File name field, and select the Default JSF template from the Template to use drop-down. Click Finish.
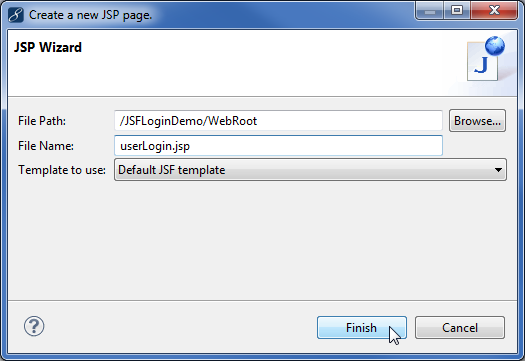
Creating userLogin.jsp - Repeat the previous two steps to add another new JSP file called userLoginSuccess.jsp.
- If faces-config.xml is not open in the JSF editor, double-click the file in the Explorer to open it. Click the Navigation Rule tab to view the flow canvas.
- Click the Page tool, and click the canvas. Select userLogin.jsp, and click OK.
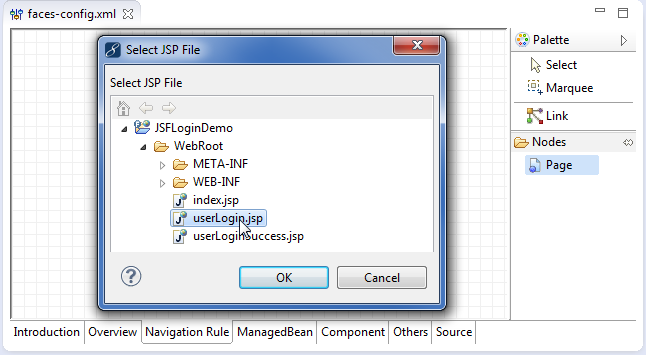
Adding a file to the flow - Repeat the previous step to add userLoginSuccess.jsp to the flow.

Adding userLoginSuccess.jsp - Double-click the userLogin node on the Navigation Rule tab to open the file in the editor.
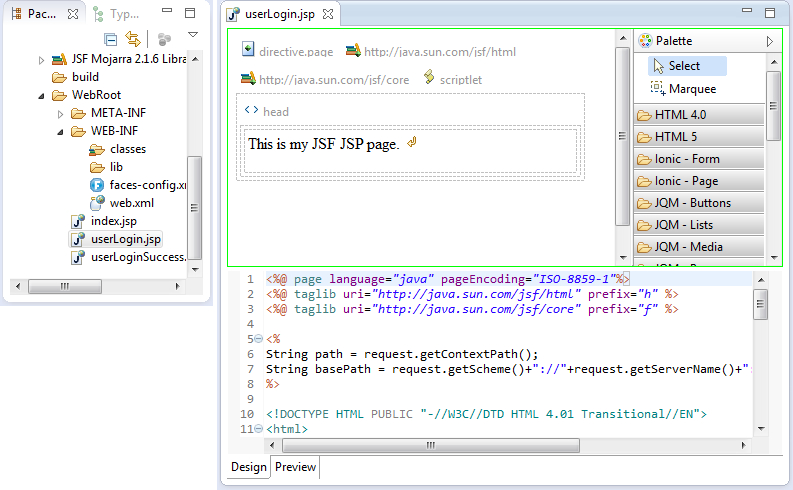
Editing userLogin.jsp
5.1 Customize userLogin.jsp
On, this page, you need to build the login form.
- Delete the default text, open the JSF Core tool palette, and select the loadBundle tool.
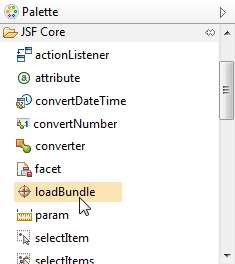
Selecting the loadBundle tool - Click inside the box on the canvas. This adds the bundle basename so the page can use the MessageBundle created earlier.
- Type com.jsfdemo.MessageBundle in the Basename field and bundle in the Var field of the Properties view.
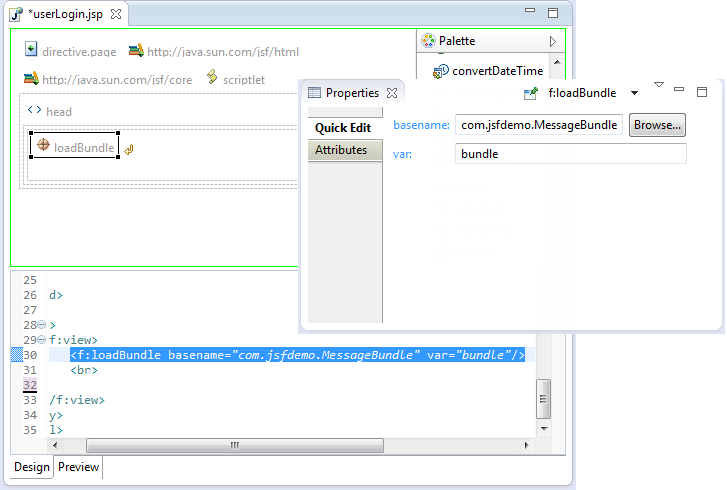
Adding MessageBundle to the JSP page and the resulting source - Open the JSF HTML tool palette, click the form tool, and click the page under the loadBundle component.
Note: To view the tools palette, you must have the Design view open. Click to show only the Design view, or click
  to show both design and source views.
 - Type loginForm in the id field in the Properties view.

Creating a form
The page now has an HTML form element to contain the login controls. The input text boxes need to be added. Start with the label for the h:inputText component for the user name. - Click the Output Label tool, and click inside the form.
- Type #{bundle.user_name_label} in the value field and userName in the for field of the Properties view.
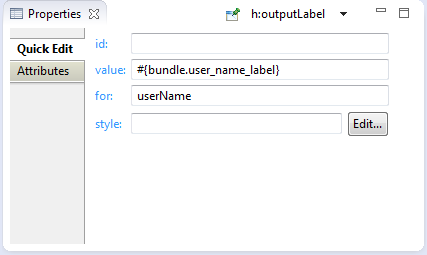
Output Label component properties - Click the Text Input tool, and click inside the form after the User Name label. Type userName in the id field and #{UserBean.userName} in the value field. Click Attributes, and select True for the JSF>required attribute value.

Adding new inputText component - Click the Output Label tool, and click inside the form after the userName Input Text field.
- Type #{bundle.user_password_label} in the value field and password in the for field of the Properties view.
- Click the Secret Input tool, and click inside the form after the label. Type password in the id field and #{UserBean.password} in the value field of the Properties view. Click Attributes, and select True for the JSF>required attribute value.
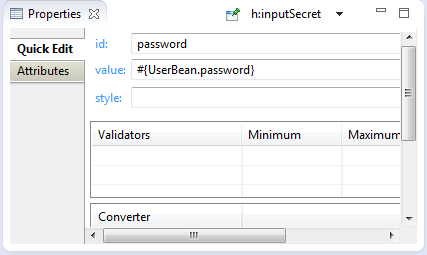
Secret Input component properties - Manually change the h:outputLabel components to wrap around the h:inputText components. Wrapping the components looks like the snippet below:
<h:outputLabel value="#{bundle.user_name_label}" for="userName">

   <h:inputText id="userName" value="#{UserBean.userName}" required="true" />
 </h:outputLabel>


<h:outputLabel value="#{bundle.user_password_label}" for="password">
   <h:inputSecret id="password" value="#{UserBean.password}" required="true" />
</h:outputLabel>
Note: Be sure to make the modification to both the userName label and password label. - Click the Command Button tool, and click inside the form.
- Type #{bundle.login_button_label} in the value field and #{UserBean.loginUser} in the action field of the Quick Edit Properties view.
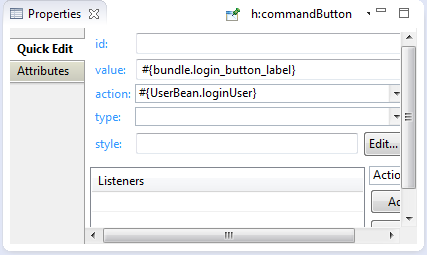
Command Button component properties - Open the HTML 4.0 tools palette, click the Line Break tool, and click the page after each input component to put components on separate lines, and press CTRL+S to save.
Layout change to the userLogin.jsp page
5.2 Customize userLoginSuccess.jsp
- Double-click userLoginSuccess.jsp in the Explorer to open it in the editor.
- Delete the default text, open the JSF Core palette, select the View tool and click inside the box on the page.
- Type Hello, you successfully logged in! on the page.
- Open the JSF HTML palette, and use the Output Text tool to add an output text element before the comma, after “Hello.”
- Type #{UserBean.userName} in the value field in the Quick Edit Properties view.
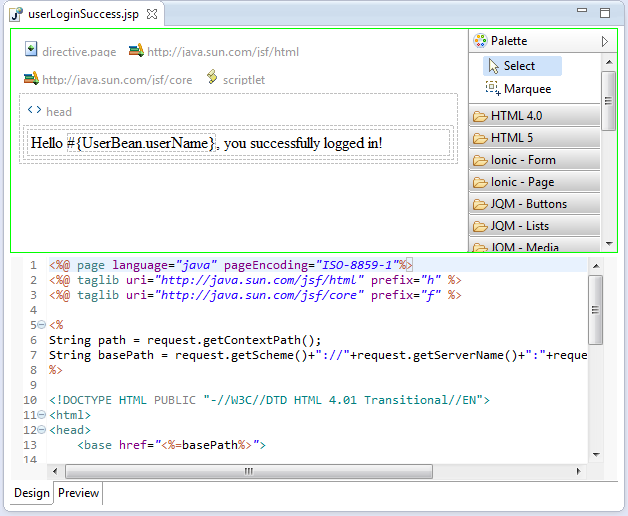
LoginSuccess page
6. Connect the JSPs
Now the pages need to be hooked together with a navigation rule in the faces-config.xml file.
- Click the faces-config.xml file tab at the top of the editor.
- Click the Link tool on the palette, click the userLogin.jsp file node, and then click the userLoginSuccess.jsp file node.
- Click the Select tool on the palette, and select the link.
- Type success in the From Outcome field of the link properties.
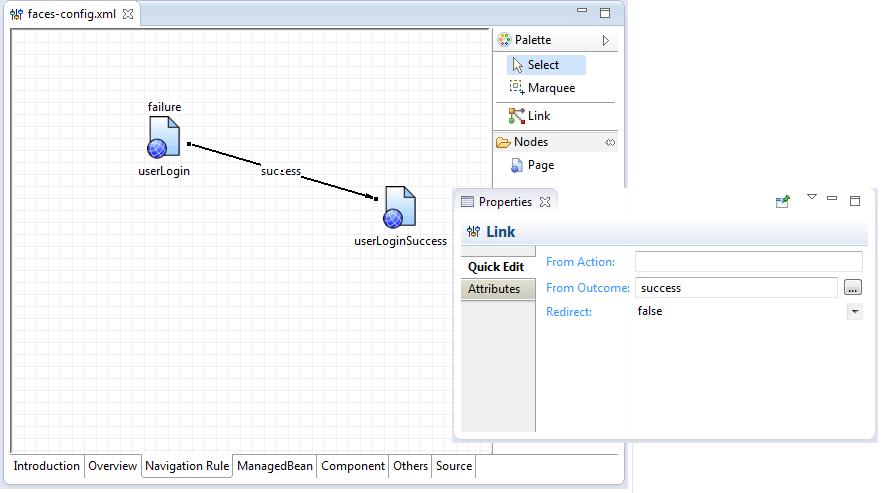
Flow for success navigation case - Click the Link tool on the palette, and click the userLogin.jsp file node twice to create a circular navigation case.
- Click the Select tool on the palette, and select the link. Type failure in the From Outcome field of the link properties. Press CTRL+S to save.
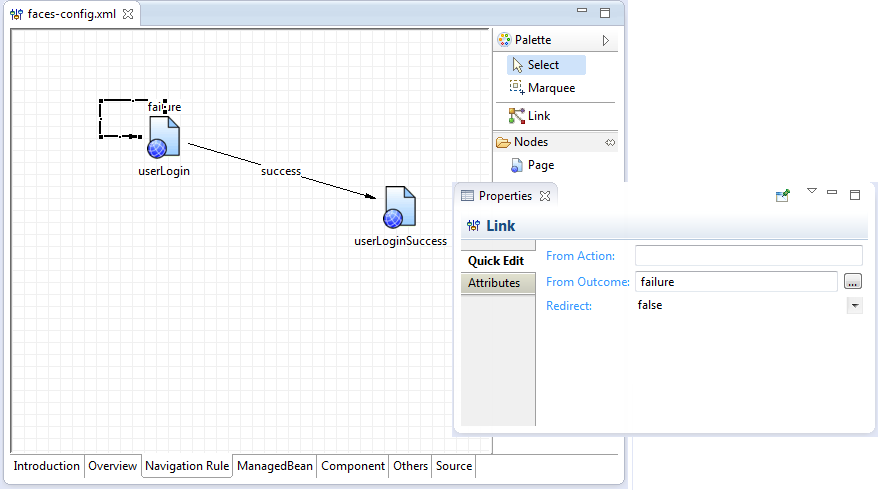
Flow for entire application
7. Run the Application
Now, you can test the application on the application server.
- Right-click the project, and select Run As>MyEclipse Server Application. Select the MyEclipse Tomcat server. The output from the server log is directed to the Console view.
Tomcat startup Log
The default index.jsp page opens in the Web browser when the application starts. - Append userLogin.faces to the address in the address bar to activate the example application.
Note: The reason the URL ends in .faces and not .jsp is because, you mapped the FacesServlet to the *.faces extension. For JSF to be given a chance to process the request and build out the component tree, you must use the .faces extension to access the actual pages. If you don’t, you will get an exception such as “FacesContext cannot be found”.
Accessing the example application - Type myeclipse for both the user name and password, and click Login.
Logging in
Successful login