

Adding and Updating Plugins
Customize your MyEclipse IDE (or Angular IDE) by adding plugins through the Eclipse Marketplace catalog or a variety of update site types.
1. Adding Plugins from a Catalog
The easiest way to add additional plugins is through the Eclipse Marketplace catalog.
- To open the catalog, select Help>Install from Catalog.
- If you know the name of the plugin you would like to add, type it into the Search field and press Enter.
Otherwise, you can browse the catalog. To browse the catalog, select a market and category from the drop-down lists to drill down to the types of tools you want to browse. You can browse through Recent, Popular, Favorites and Installed tools by clicking the respective tab. - When you find a tool you want to add to your IDE, click the Install button, and follow the installation wizard.
- If there are additional plugins you’d like to add, from either the catalog or update sites, you can add any combination of them at this time.
- After all plugins are installed, restart to apply the changes.

Installing a plugin from the catalog
2. Adding Plugins from an Update Site
If a plugin is not available on the Eclipse Marketplace, you have the option to add it via an update site.
- Select Help>Install from Site (or Install New Software in Eclipse).

Installing from an update site - Click Add. The Add Repository screen appears.
- Provide a description in the Name field.

Adding update site information - Type a URL for the update site in the Location field.
Most update sites are accessed via a URL; however, you can click Local to update from a local update site on your machine or click Archive to update from an archived update site in a zip archive. - Click OK to return to the Install window.
- Expand the update site you just added, and select the plugins to add. After adding all software, click Next to review the list of software to install.

Selecting software from an update site - Click Next to accept the license agreement.
- Click Finish to begin installing the add-on software. After installation is complete, you are prompted to restart to activate your changes.
3. Installing Plugins to MyEclipse Using the Dropins Folder
You can also install plugins using the dropins folder within your MyEclipse installation folder. This option is provided primarily for backward compatibility to support plugins for which no traditional update site is available. If either a catalog entry or update site is available, then we recommend using one of those methods. Adding plugins using the dropins folder should be treated as a method of last resort and only employed when no other option is available.
- Exit your IDE.
- Open your file explorer and navigate to the dropins folder under the installation folder.
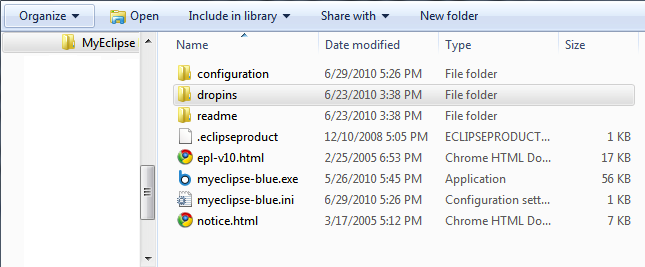
Navigating to the dropins folder - Navigate to the zipped plugin to install and extract it to the dropins folder within your installation folder.
- After you extract the file, be sure the features and plugins folders are immediate children of the dropins folder or the plugins will not be recognized when you start the IDE.
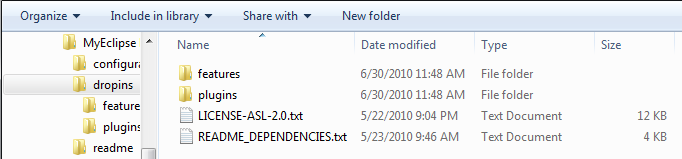
Dropins folder populated with plugin files - Start your IDE to see if the plugins were successfully added. Upon startup, any plugins in the dropins folder are added and a message displays with the details.
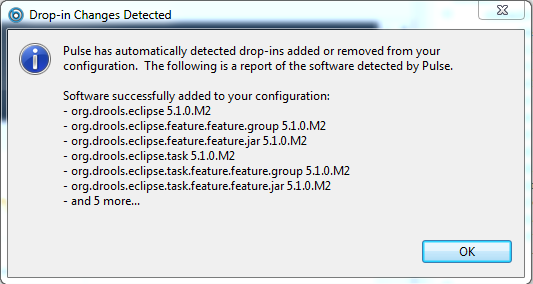
Reporting of detected plugins
4. Updating Your IDE and Added Plugins
To install updates to either your IDE or external plugins, select Help>Check for Updates from the menu. You can see the available updates for your IDE and any installed plugins. You also have the option to lock to a specific version.

Available software updates
5. Adding and Removing MyEclipse Components
MyEclipse has an extensive feature list; however, you can customize MyEclipse to include only those features you use.
- Select Help>Choose Components from the menu.
- Update the component list.
To add a component, select the component from the Not Selected list and click the right arrow image or double-click the item.
To remove a component, select the component from the Selected list and click the right arrow image, or double-click the item.
Choosing Optional Components in MyEclipse - Click Apply changes.
- Restart MyEclipse to see your changes.