

Importing Third-Party Software
Importing software adds it to your third-party software library, making if available to packages as you choose. Imported software is added to your delivery hub so you can make it available to your users from behind your firewall.
In this tutorial, you will learn how to:
- Import from an Eclipse update site
- Add non-Eclipse/binary files to your software library
1. Import Third-Party Software from Eclipse Marketplace or Update Site
- Click
 in the Available Extra Software section to open the Third Party Library page. Alternatively, click Third-Party Libraries under Software Collections in the Admin Console navigation.
 - Click
 in the Libraries section, which lists all third-party libraries you have added as potential extra software for a package.
Note: To remove a library, select it, and click .
. - Select the New Library Import Mode.
Import from Eclipse marketplace—Select this option to search for software on the Eclipse Marketplace.
Import existing Eclipse update site—Select this option to download from an existing update site or local archive of a site. - Click Next.
If you have not set up your organization’s signing certificate, you will see the following warning message. See Configuring Signing Certificates for more information. Click Next to continue.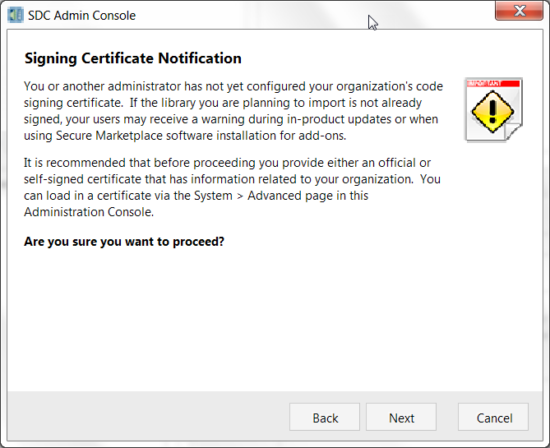
Signing certificate warning - Select the software library:
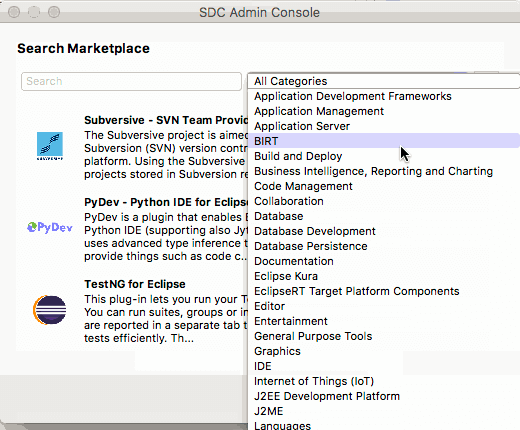
Eclipse Marketplace—If you chose this method, you can search for software by name or filter by categories, select the software and click Next.
Selecting software from the Eclipse Marketplace
Update Site—If you chose this method, click, type the URL where the software libraries are located, and click OK. You can add multiple update sites to a library.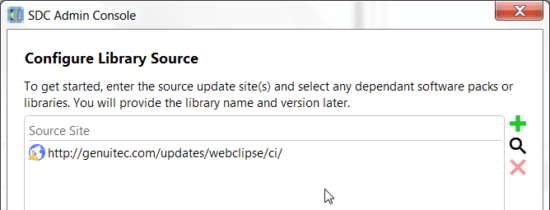
Adding the software URL and dependencies
Note: Beginning in SDC 2017, if the selected update site has an expired SSL Certificate, a notification displays. Click OK to continue with the download or Cancel to abort.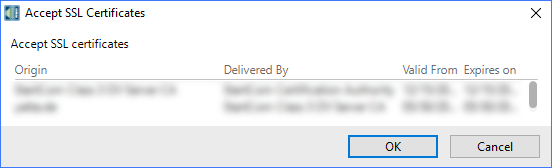
Expired SSL Certificate warning
Note: If you cannot access external sites except through a proxy server, you receive an error. Although the administrator is required to enter proxy server information when acquiring the software for a library, end users are not required to enter this information because software is exposed to them from the delivery hub inside your firewall.
If you receive this error, click the Setup Network button to provide your proxy server settings so SDC can access the external third-party site. These settings are not saved and must be entered each time you attempt to access a third-party site.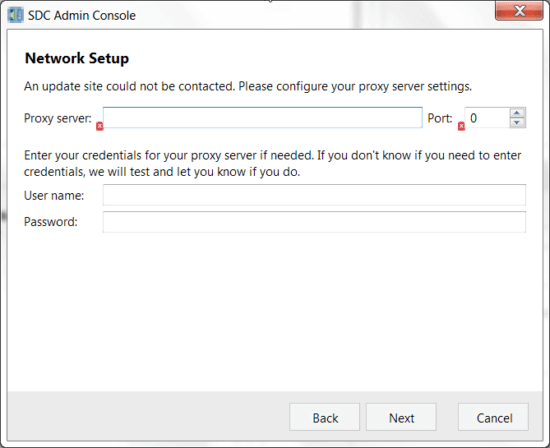
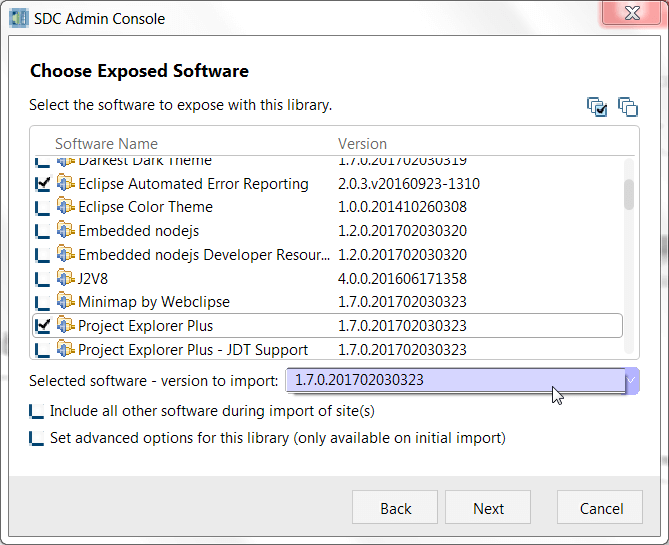
Entering proxy server settings - If using an update site, select one or more software tools and version to expose. When importing from Eclipse Marketplace, the software is already selected but can be modified. By choosing the exact versions of software to import, you can have multiple versions, including older versions of software imported onto the hub machine. Select the Include All Other Software checkbox to import the full site(s) rather than just the dependencies of the software you selected to expose. Click Next.
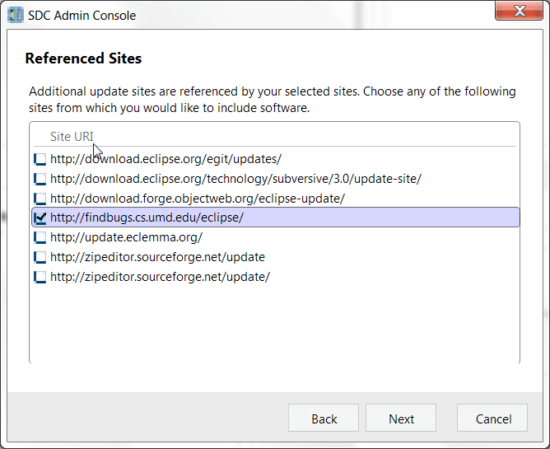
Selecting software to expose - If other update sites are referenced by the site you entered, select these update sites, as well. Click Next.
Referenced update sites - Review the software license, select the checkbox if you accept the terms, and click Next.
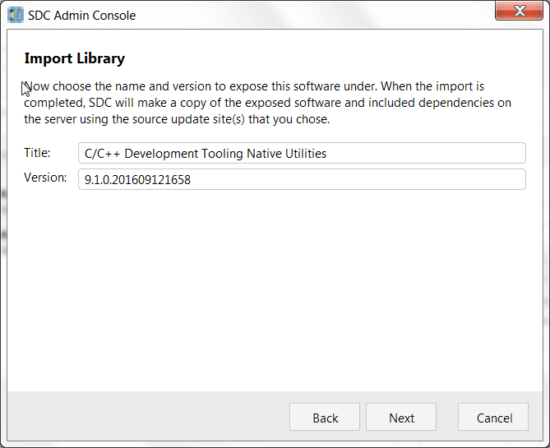
- Enter a title for the add-on software and a version number. This can be your own versioning system, or it can match the software version number, which is filled in by default. Click Next.
Naming the software add-on - Enter a library title and description on the Exposed Software Details tab.
- If you want the library to be available to be added to Secure Marketplace catalogs, select the Visible in Catalog checkbox. The actual visibility of a catalog is controlled by a package’s security policy.
- To help identify the add-on software in the catalog, you can provide a 100×80 pixel image. Drag an image from your file explorer, or click
 to locate the file. To remove the image file, click .
Note: This image is already supplied when you download from the marketplace.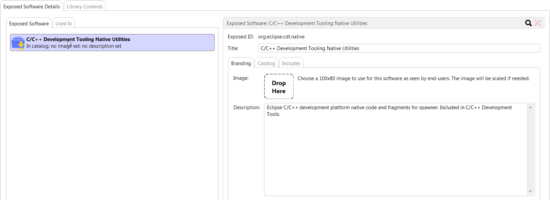
Exposed software details
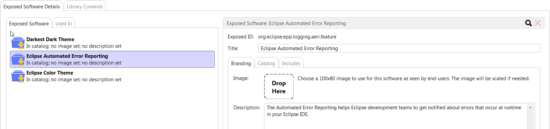
1.1 Including Multiple Libraries as a Single Catalog Entry
When you expose a third-party library that requires additional software to be installed, such as with Subversive, you can include the additional software as part of a single catalog entry so end users are not required to know to install the additional software separately. Additional software to be installed in conjunction with selected third-party software is added via the Also Include box of the software details.
In the example below, the Subversive library includes software from two update sites. You can select one to expose in the catalog, and then include additional software to be installed along with the one appearing in the catalog. In this way, you can have a single Subversive entry in the end-user catalog, and it will install all required software with a single installation.
Including additional software from the Subversive library to be installed along with SVN Team Provider
2. Import Non-Eclipse/Binary Files as Third-Party Software
Software that does not come from an update site can be added in your library for inclusion in packages. For example, you might have an archive file of application server software that you would like to include in packages. Use the binary contents import mode to add non-Eclipse-based software to your third-party library.
- Click in the Available Extra Software section to open the Third Party Library page. Alternatively, click Third-Party Libraries under Software Collections in the Admin Console navigation.
- Click in the Libraries section.
- Select the Package Binary Contents for Delivery library import mode, and click Next. If you have not set up your organization’s signing certificate, you will see the following warning message. See Configuring Signing Certificates for more information. Click Next to continue.
Signing certificate warning - Click , navigate to the file you want to include, specify the operating systems that apply to the file, and click Next. You can continue adding more files, if necessary.
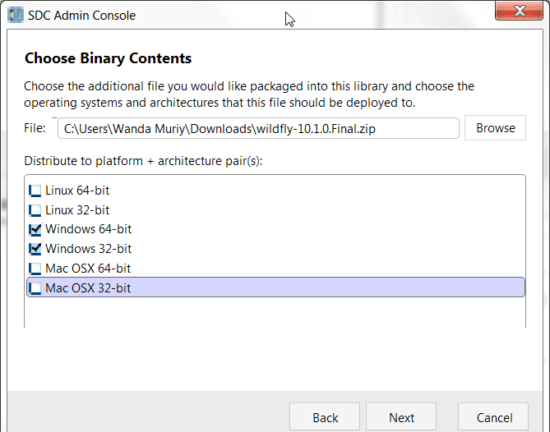
Importing binary file into the third-party library - Enter a title and version, and click Next to import the file(s) into the library.