

Developing a REST Web Service
Develop REST web services to amp up your web applications. In this tutorial example, you will create a simple web service for maintaining a list of customers. You will learn to:
- Develop a REST web service
- Deploy to the Tomcat serve
- Test with the REST Web Services Explorer
This feature is available in MyEclipse.
1. Begin with a REST Web Service Project
The REST Web Service Project wizard gets you started with your project configuration.
- Select File>New>Web Service Project.
- Type restdemo in the Project Name field, select the JAX-RS (REST Web Services) framework option, and click Next.

Creating a Web Service project - Accept the default source folder, and click Next.
- Click Finish to accept defaults for the purpose of this example.
Finishing the project
2. Create a New REST Web Service
With your project in place, you can create your web service. You will create classes necessary for managing the customer entity and a class for your resource methods.
2.1 Creating the Customer entity
This simple Customer class contains id, name, and address fields and represents the Customer entity you manage with the web service.
- Right-click the restdemo project, and select New>Class.
- Type com.myeclipseide.ws in the Package field, type Customer in the Name field, clear the Public Static Void Main checkbox if selected, and click Finish.

Creating a Java class - Replace the default contents of the generated class with the following code, and save the file.
package com.myeclipseide.ws;

import javax.xml.bind.annotation.XmlRootElement;
@XmlRootElement

public class Customer {
  private int id;
  private String name;
  private String address;

  public int getId() {
     return id;
  }

  public void setId(int id) {
    this.id = id;
  }

  public String getName() {
     return name;
  }

  public void setName(String name) {
     this.name = name;
  }

  public String getAddress() {
     return address;
  }

  public void setAddress(String address) {
    this.address = address;
  }

}
You are using XML as the serialization format, i.e. you send and receive Customer entities from the web service using XML.
The @XMLRootElement annotation in the Customer class is a JAXB annotation that allows JAXB to convert this entity from Java to XML and back. It is possible to annotate the fields and methods within the class to customize the serialization, but for this tutorial, the JAXB defaults are fine.
2.2 Create the Resource Class, the Core of the Web Service
- Right-click the restdemo project, and select New>Other.
- Type web service in the filter field, select Web Service, and click Next.

Creating the new web service - Select the Create web service from Java class option, select the Create new Java bean checkbox, and click Next.

Creating the new web service - Type customers in the URL path field, select the Singleton Lifecycle option, select application/xml from the Produces drop-down, type com.myeclipseide.ws in the Java Package field, and type CustomersResource in the Java class field.

Web service configuration details
URL path—Indicates the path at which this resource can be reached. For this tutorial, you use customers because this resource manages our customer list. The resource will be hosted at “/customers”.
Singleton Lifecycle—Ensures only one instance of this class is created by Jersey per web-application.
Consumes and Produces—Can be used to specify the default mime type(s) of data this resource can accept and generate. These values can be overridden by individual methods in the class. As mentioned above, you are serializing to XML, so you use the application/xml mime type. - Click the Add button to add the method that fetches a list of customers.
- Type getCustomers in the Method name field, java.util.List<Customer> in the Return type field, and click Finish.

Adding a method
HTTP method—Can be used to specify the type of HTTP request this method responds to, in this case.
Method Signature preview—Updated as you make changes to the page, giving you an idea of what your generated method will look like. - Click the Add button again to add a method that returns details of a specific customer.
- Type getCustomer in the Method name field, Customer in the Return type field, and {id} in the URL path field.

Adding a second method - Click the Add button to add a Method parameter. Type int in the Java Type field, cId in the Java Name field, select PathParam from the Param Type drop-down, and type id in the Param Name field. Click Finish.

Adding method parameters
URL Path—Specifies the path at which this method can be reached, relative to the containing resource.
In this case you specify {id}, which means this resource method can be reached at /customers/{id}. The curly braces denote a URI variable. These variables are substituted at runtime for a resource to respond to a request based on the substituted URI.
Parameters—Edit the parameters directly in the table. Because you need the value of the id variable, you use the PathParam annotation to map it to the cId parameter. - Add a method that allows you to add a new customer to the list. Fill in the fields as shown below, and click Finish.

Creating the addCustomer method
In this case, you’re responding to a POST request and expect application/xml input, which would be deserialized into the customer parameter. The customer parameter is an Entity parameter (unannotated) and is mapped directly from the message body of the incoming request. You also override the default application/xml output specified by the CustomersResource class and specify text/html instead.
After adding those three methods, the configuration should look like this:
Final web service configuration - Click Finish to generate the CustomersResource class. Open the file to see stubbed out resource methods.
3. Provide Implementations for the Methods You Generated
Now, you need to provide implementations for the methods you created using the wizard. In a real application, at this point you would probably wire in a database using JPA or Hibernate to help manage the customer list, but a simple in-memory map is sufficient for this tutorial.
The implementation is simple; when a customer is received by the service, you give the entity a counter-based id and add it to the map. Retrieving a customer from this map by id and providing a list of customers is straight forward as you can see below.
Replace the content in the CustomersResource class with the following code. Observe that the class and method signatures have not changed. You are fleshing out the generated stubs with an implementation of the service. You also add a single customer to the list for demonstration purposes.
package com.myeclipseide.ws;
import java.util.ArrayList;
import java.util.List;
import java.util.TreeMap;
import javax.ws.rs.Consumes;
import javax.ws.rs.GET;
import javax.ws.rs.POST;
import javax.ws.rs.Path;
import javax.ws.rs.PathParam;
import javax.ws.rs.Produces;
import com.sun.jersey.spi.resource.Singleton;
@Produces("application/xml")
@Path("customers")
@Singleton

public class CustomersResource {
private TreeMap<Integer, Customer> customerMap = new TreeMap<Integer, Customer>();
public CustomersResource() {
    // hardcode a single customer into the database for demonstration
    // purposes

    Customer customer = new Customer();
        customer.setName("Harold Abernathy");
        customer.setAddress("Sheffield, UK");
        addCustomer(customer);
    }
@GET
    public List getCustomers() {
        List customers = new ArrayList();
        customers.addAll(customerMap.values());
        return customers;
    }
@GET
    @Path("{id}")
    public Customer getCustomer(@PathParam("id") int cId) {
        return customerMap.get(cId);
    }
@POST
    @Path("add")
    @Produces("text/plain")
    @Consumes("application/xml")

    public String addCustomer(Customer customer) {
        int id = customerMap.size();
        customer.setId(id);
        customerMap.put(id, customer);
        return "Customer " + customer.getName() + " added with Id " + id;
    }

}
4. Deploy the Web Service Application
The fastest way to deploy the web service is by using the Run As or Debug As MyEclipse Server Application action.
- Right-click the project, and select Debug As (or Run As)>MyEclipse Server Application.
- Select MyEclipse Tomcat, and click Finish.
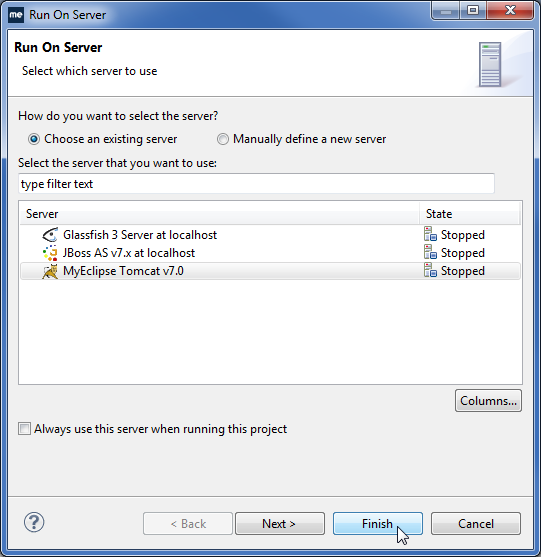
Selecting a server for deployment
MyEclipse performs the following steps:
- Packages the Web Service project and deploys it in Exploded format to the application server
- Starts the application server and loads the project
The MyEclipse Web Browser opens the default index.jsp page of our the Web Service application. You don’t need this because you aren’t testing a web page, so you can close this view.
5. Test with the REST Web Services Explorer
The REST Web Services Explorer is unavailable at the MyEclipse Standard subscription level. If you are a MyEclipse Standard subscriber, follow the instructions in Testing a Web Service Using a Standard Browser.
- Right-click the restdemo project, and select Web Service Tools>Test with REST Web Services Explorer
 This menu option was updated in MyEclipse 2017. For prior versions, click here.
.
This menu option was updated in MyEclipse 2017. For prior versions, click here.
.
Note: If you deployed restdemo to an application server other than MyEclipse Tomcat, the WADL URL used in the explorer could contain an incorrect port, preventing the explorer from loading your WADL file. Correct the port, and click the Go button to proceed.
You can also open the REST Web Services Explorer by clicking the drop-down arrow on the Web Services Explorer icon on the toolbar, and selecting Launch REST Web Services Explorer. In this case, you must enter the path of a WADL file in the address bar before proceeding.
 - Expand the tree to the {id} node, and select the getCustomer method.

Selecting the method to test - Click Test method. A new tab opens where you can enter information and run the test.

getCustomer tab for testing the method - Type 0 in the id field, and click the Run Test icon
 .
.
Retrieving the one customer in the list - Close the getCustomer tab.
- Expand add in the tree, select the addCustomer method, and click Test method.
- In the Body, type application/xml area of the addCustomer tab, paste the following code, and click .
<customer>
    <name>Bill Adama</name><address>Vancouver, Canada</address>
</customer>
The response confirms, Customer Bill Adama added with Id 1.
Testing the add function - Close the addCustomer tab.
- Select getCustomers in the customers node, and click Test method.
- Click . The two customers in the list are returned by the service in XML.

Retrieving the entire customer list
6. Resources
- restdemo.zip contains a Java EE 6 version of the restdemo project created in this tutorial.
- JSR 311- JAX-RS: Java API for RESTful Web Services.
- Project Jersey is the JAX-RS reference implementation MyEclipse uses.
- RESTful Web Services Developer’s Guide