

JAX-WS SOAP Web Services
This document presents an overview of the web services development features, which include tools for rapidly developing and testing web services and a light-weight deployable web services container.
This feature is available in MyEclipse.
1. JAX-WS Web Services
Web services are increasingly seen as the core technology of the future for developing IT solutions capable of crossing the traditional borders of implementation technology, OS and hosting environment, and intra-enterprise and inter-enterprise business domains. This document presents an overview of the MyEclipse web services development features, which include tools for rapidly developing and testing web services and a light-weight deployable web services container. Key web services development features include:
- Top-down and bottom-up web service creation tools
- Web Service Explorer for testing web services
- WSDL creation, editing and validation tool, including JSR-181 WS annotations
- Web service project creation, configuration and validation
- Deploy web services to any Java servlet 2.4+ container
- Debug Java web service implementations
2. Web Service Projects in MyEclipse
The first step in developing a web service is to create a MyEclipse Web Service project. This type of project is an extended web project that is fully deployable to any servlet 2.4 or greater container.
Create a new Web Service project by clicking the drop-down arrow on the New icon ![]() on the toolbar, and selecting Web Service Project from the menu. This opens the New Web Service Project wizard.
on the toolbar, and selecting Web Service Project from the menu. This opens the New Web Service Project wizard.
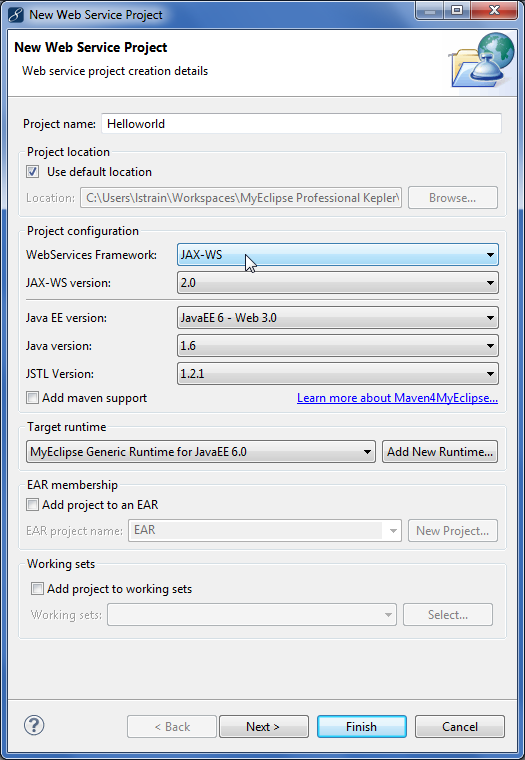
Web Services project details
With a project in place, you can add the web service. Click the drop-down arrow on the New Web Service icon ![]() on the toolbar, and select New Web Service from the menu. Specify the project for which you are adding the web service, and choose the framework and strategy. The two strategies are discussed in Section 3 and Section 4.
on the toolbar, and select New Web Service from the menu. Specify the project for which you are adding the web service, and choose the framework and strategy. The two strategies are discussed in Section 3 and Section 4.
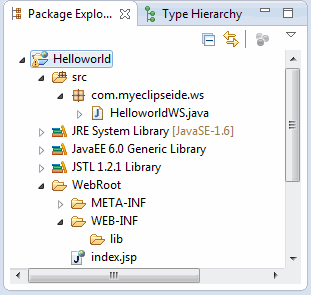
Web service project structure
2.1 Web Service Project Libraries
MyEclipse JAX-WS libraries simplify the build-path management of JAX-WS JARs. The MyEclipse web service project MyEclipse JAX-WS libraries are provided by the target runtime you selected during project setup. You can select additional JAX-WS features to support in your project by adding or removing MyEclipse JAX-WS libraries via project preferences.
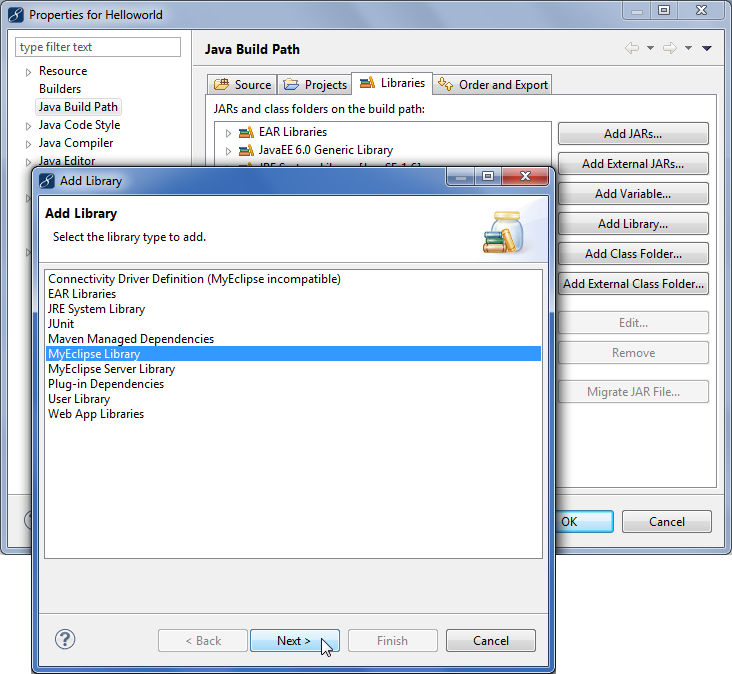
Adding new libraries to the project build path
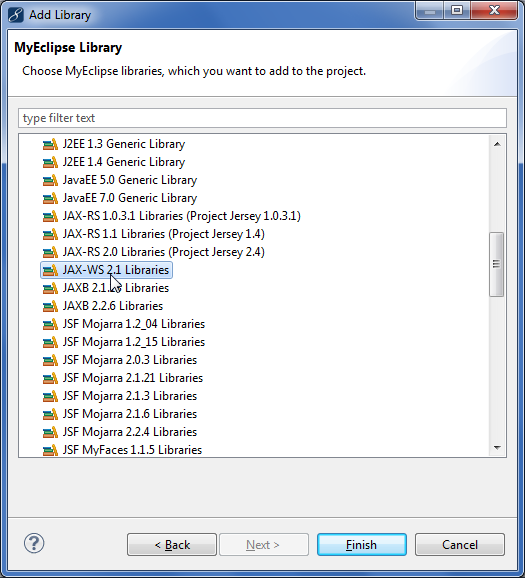
MyEclipse JAX-WS libraries that can be added to a Web Service project
3. Bottom-up (Code-First) Web Service Development
The MyEclipse Web Service Wizard supports the bottom-up web service development process. This process concentrates initial development effort towards the creation of application business logic in the form of Java beans (POJOs) prior to defining the web service interfaces (WSDL). To use the bottom-up strategy, you must create a java package and class file before adding the web service.
Create the Java package by right-clicking the src folder of your project, and selecting New>Package from the menu. After the package is in place, right-click it, and select New>Class from the menu. When you create the class file, it opens in the editor.
Note: Before you can add a web service, you must have at least one valid method in your java class file.
After your package and class are created, you are ready to add a web service using the bottom-up strategy. Click the drop-down arrow on the New Web Service icon ![]() on the toolbar, and select New Web Service from the menu.
on the toolbar, and select New Web Service from the menu.
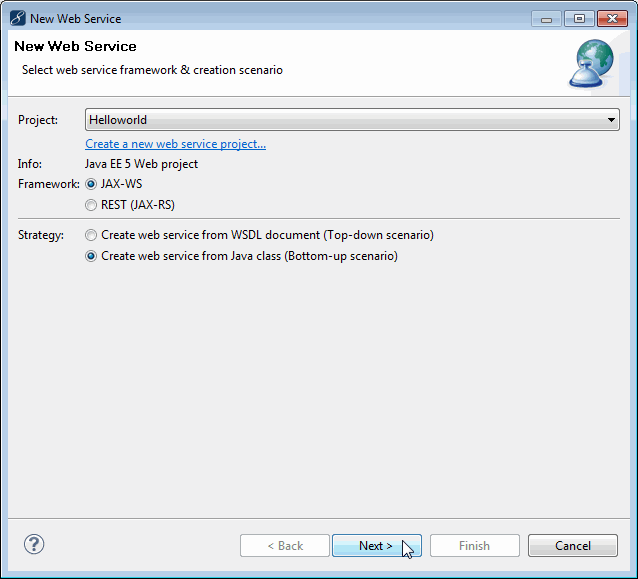
Select the Web Service project in which to add the new web service, choose the JAX-WS framework, and select the Create web service from Java class option.
Specifying the bottom-up web service creation strategy
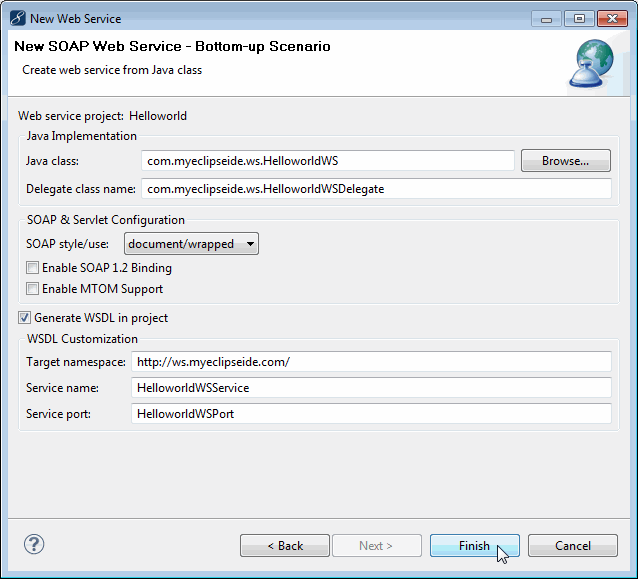
Web service configuration details
Upon completion, your project contains a Java implementation class, HelloworldWSDelegate.java, and a deployment descriptor file, sun-jaxws.xml.
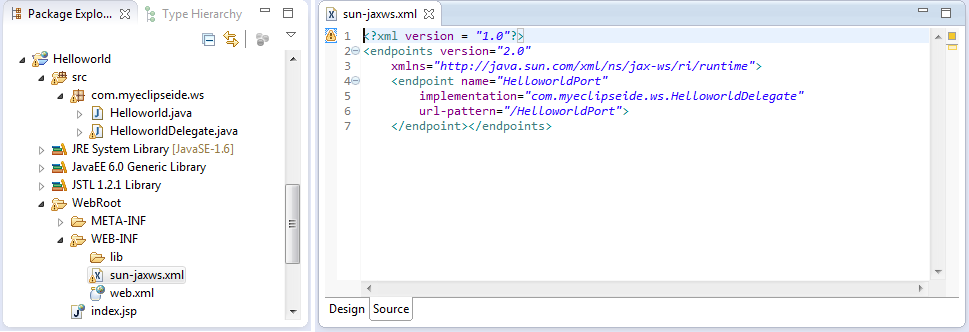
Bottom-up Web Service project
4. Top-Down (WSDL-First) Web Service Development
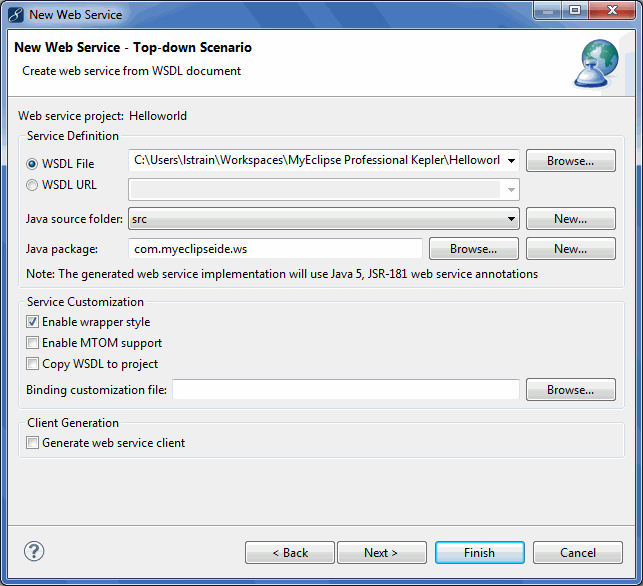
The MyEclipse New Web Service wizard also supports the top-down web service development approach. This process concentrates initial development effort towards the definition of web service interfaces in the form of WSDL prior to web service implementation.
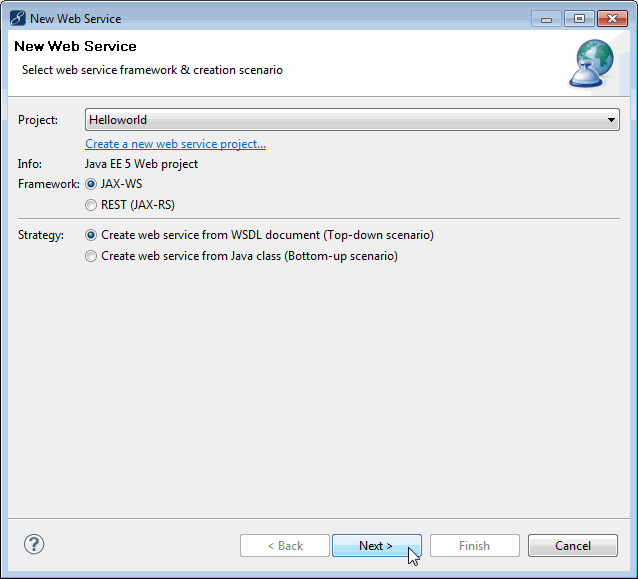
Specifying the top-down web service creation strategy
Specify the WSDL file location, the Java-XML binding to generate, and the Java source folder and package where web service skeleton will be generated.
Note: You must have a WSDL file available before adding a top-down scenario web service. You can create one in your project by right-clicking the WebRoot folder in the project, and selecting New>Other from the menu. Expand MyEclipse>Web Services, and select WSDL. See Section 6 for more information.
Web service configuration details
Click Next to validate the selected WSDL file. A WSDL file you select in the top-down scenario is validated before the code generation process. WSDL validity and WS-I compliance are checked, giving you the opportunity to correct any mistakes before generating code.
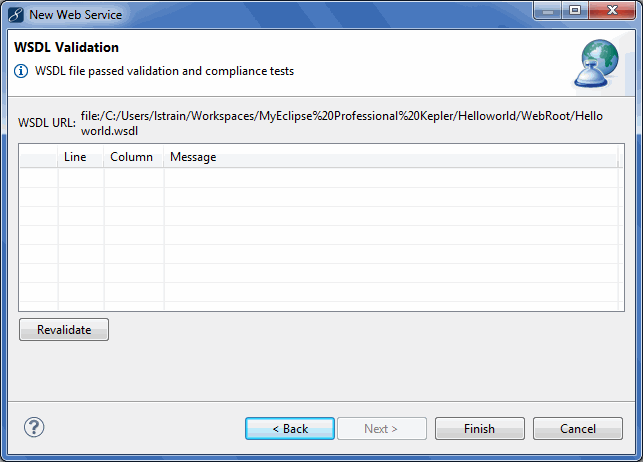
WSDL validation results
Upon completion, the project contains Java-XML binding classes in the Java package.
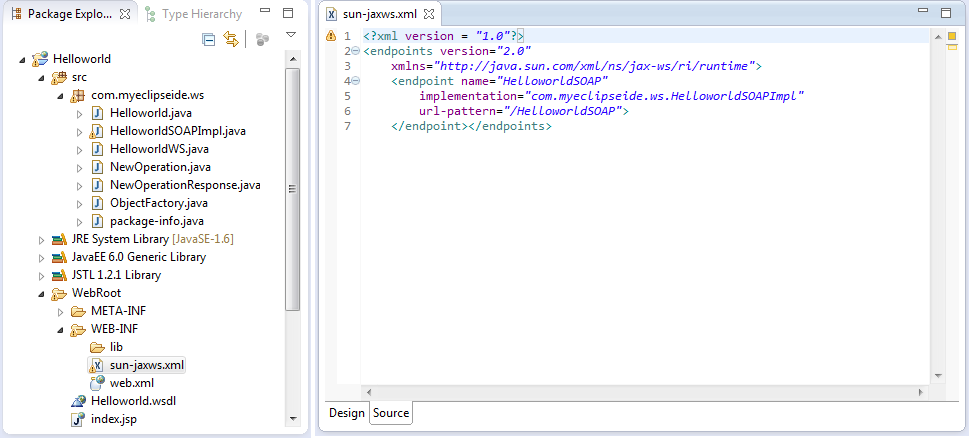
Top-down Web Service project
4.1 WS-I Profile Validation Preferences
Web Services Basic-I Profile (WS-I) is a web services interoperability standard that defines the technologies, their specification levels and restrictions to form a common interoperable web service platform. MyEclipse web services tools can be enabled to validate web service projects for conformance with the WS-I specification.
Access these preferences by selecting Window>Preferences from the menu. Expand MyEclipse>Validation, and select WS-I Profile.
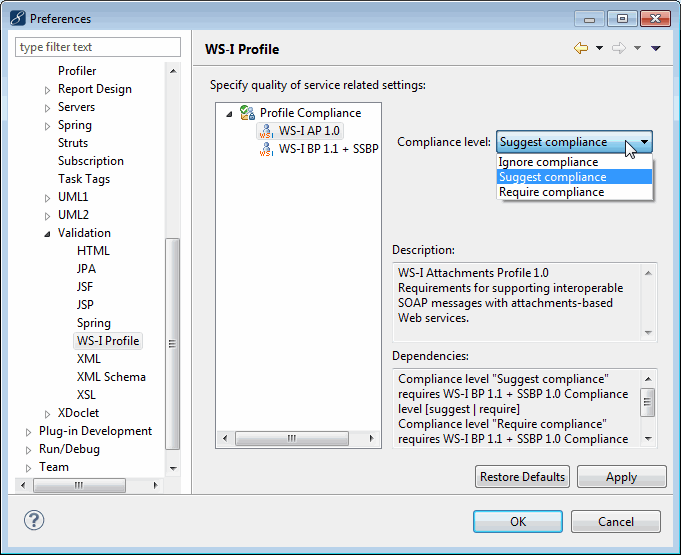
WS-I validation preferences
5. JAX-WS Annotation Support
MyEclipse enables the Java editor to support JSR-181 annotations. The Java editor immediately recognizes web service annotations for MyEclipse Web Service projects.
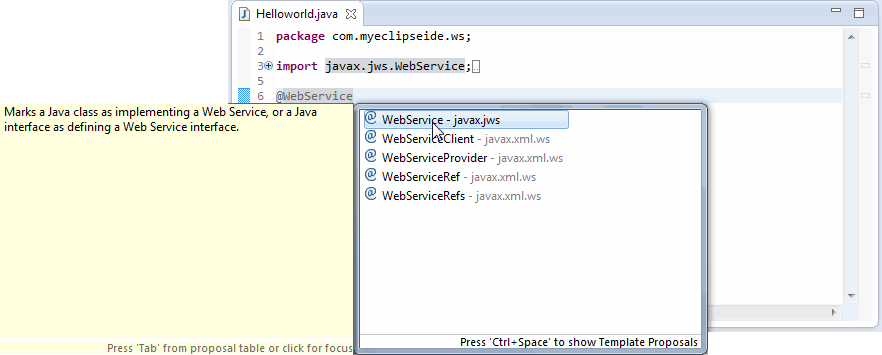
Code assistance with JSR-181 annotations in Java editor
6. WSDL Creation and Editing
The New WSDL File wizard creates a skeleton WSDL file. To create a new WSDL file, select File>New>Other from the menu, expand MyEclipse>Web Services, and select WSDL.
Select the project folder in which you want to place the WSDL file, and give the file a name.
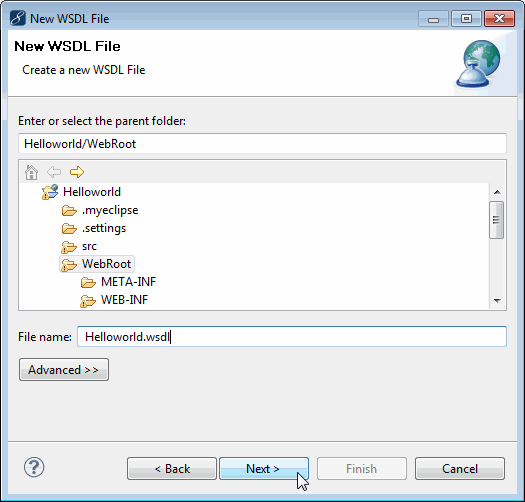
Creating a new WSDL file
Enter the namespace, and select the Create WSDL Skeleton checkbox.
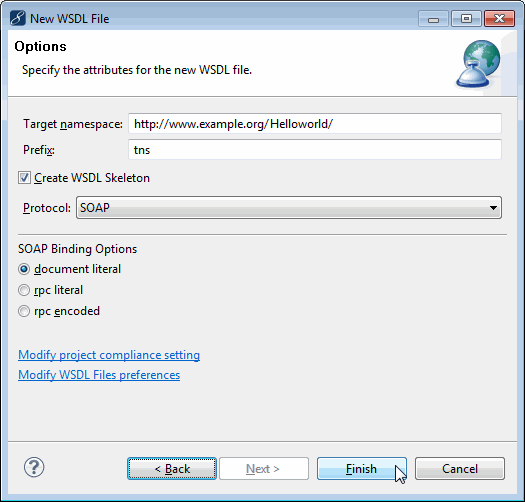
WSDL configuration details
Upon completion the skeleton WSDL file is created and opened in the MyEclipse XML editor for review and revision.
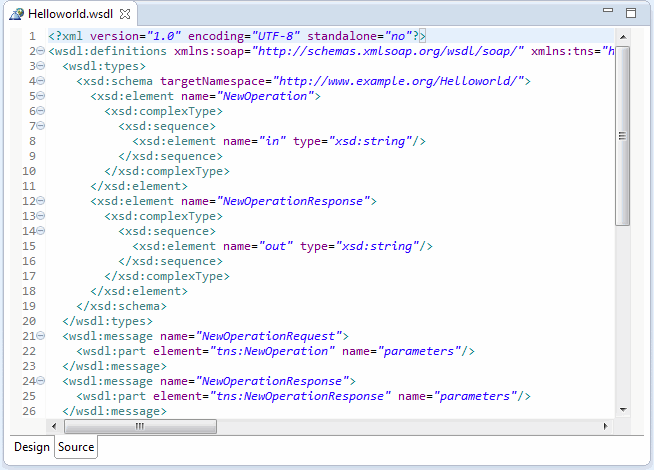
WSDL editor – Source mode
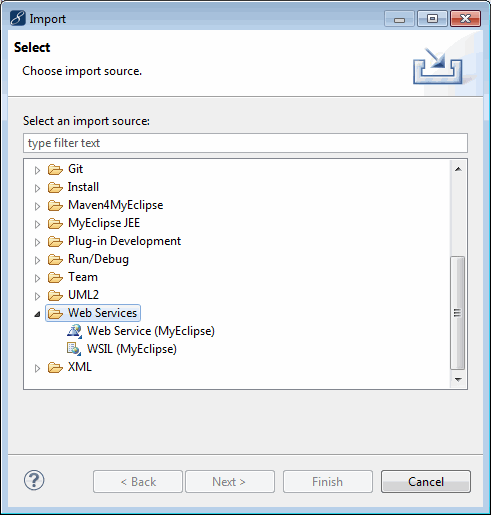
7. Importing Web Services and WSIL Files
Use the MyEclipse Web Service Import wizard to import WSDL and WSIL files into your project. Select File>Import from the menu.
Launching the WSDL Import wizard
8. Web Service Client Development
Convenient context-menu actions allow you to create a new Web Service client or a new Web Service by right-clicking a WSDL file in Package Explorer.
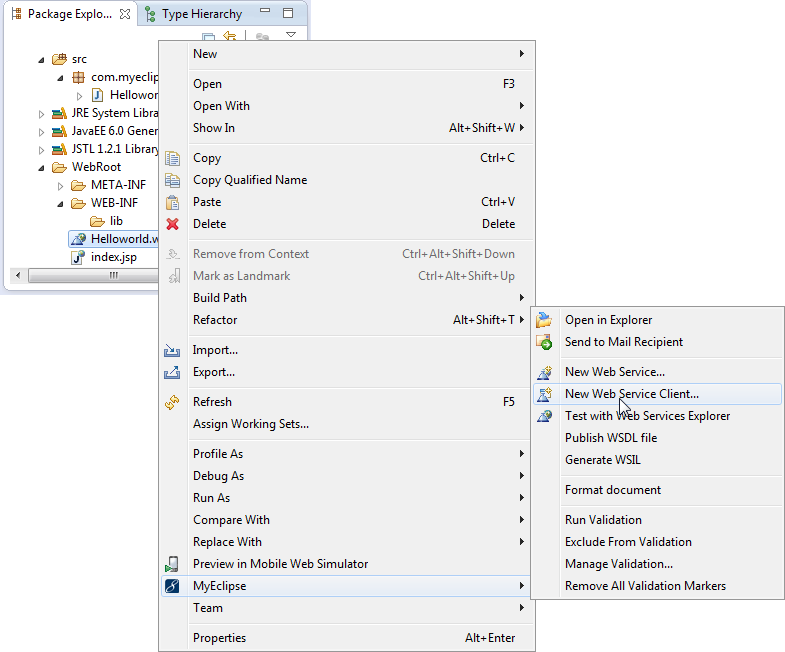
Launching the Web Services Client wizard
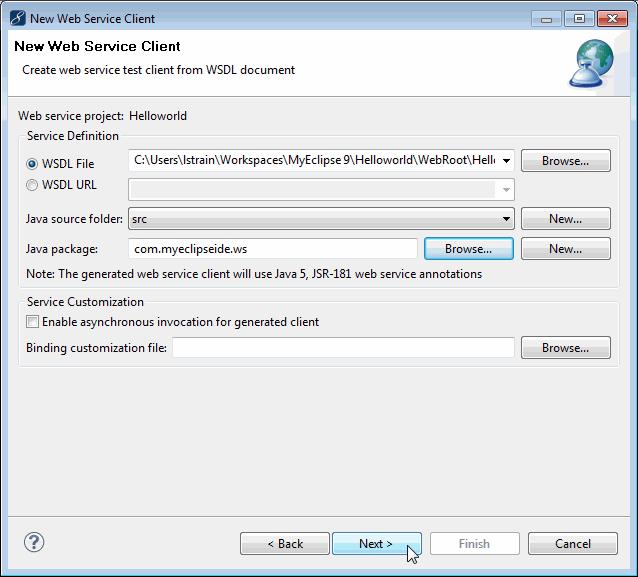
Web service client details
9. Web Service Project Deployment and Debugging
A MyEclipse Web Service project can be deployed to any Java EE 1.4 or higher servlet container. During the deployment process, MyEclipse dynamically packages a project’s web service resources into a web archive (WAR). The deployment services are able to package and publish the Web Service project in both exploded archive form for development time debugging and in packaged archive form for production time distribution. The Exploded deployment type provides hot-sync update of all modified Java and web resources of a Web Service project.
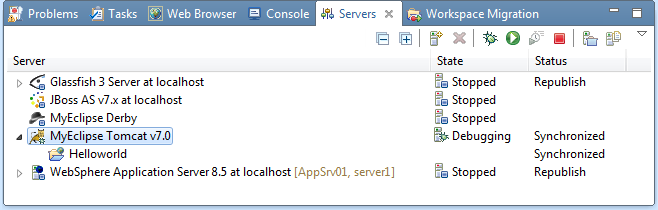
Deployed Web Service project in the Servers view
Once deployed, standard MyEclipse web debugging facilities are available to all Web Services projects. These include hot-swap Java debugging and hot-sync JSP and JavaScript debugging.
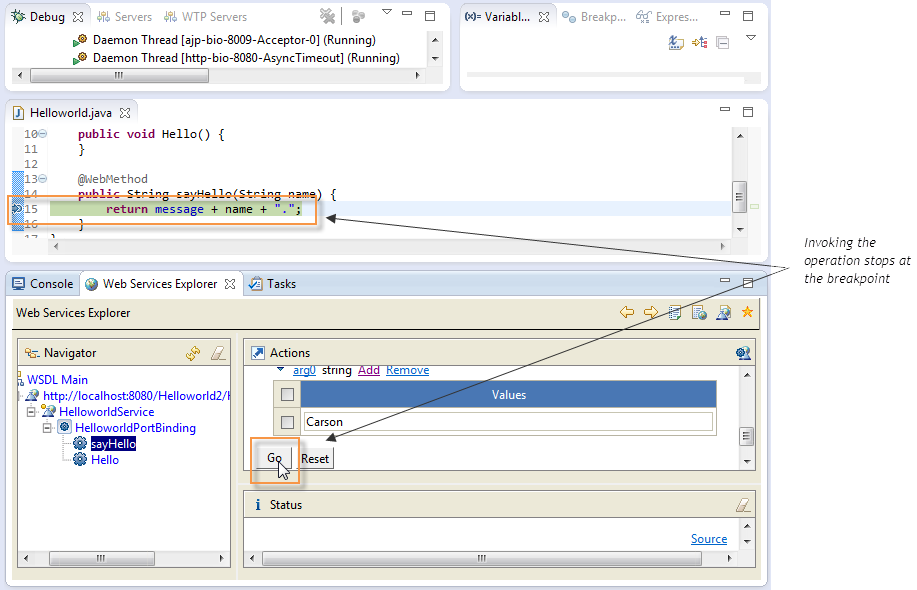
Debugging a web service implementation
10. Testing with the Web Service Explorer
MyEclipse web services tools include the Web Service Explorer for dynamically interacting with local and remote web services. All you need is access to the WSDL document that defines the web service interface. The Web Service Explorer reads a WSDL document for the service you want to interact with and generates a dynamic interface that allows you to send SOAP requests and view corresponding SOAP responses.
Launch the Web Services Explorer by clicking the drop-down arrow on the Web Services Explorer icon ![]() on the toolbar, and selecting Launch SOAP Web Services Explorer from the menu.
on the toolbar, and selecting Launch SOAP Web Services Explorer from the menu.
Select the WSDL mode by clicking the WSDL Page icon ![]() on the Web Services Explorer toolbar. Click the WSDL Main link, and enter the path to the WSDL file. In the example below we used the URL http://localhost:8080/HelloWorld/services/HelloWorldService?WSDL.
on the Web Services Explorer toolbar. Click the WSDL Main link, and enter the path to the WSDL file. In the example below we used the URL http://localhost:8080/HelloWorld/services/HelloWorldService?WSDL.

Testing a web service in the Web Services Explorer
Once the WSDL is retrieved, the Web Service Explorer presents a list of end points. Above, you can see the “example” operation is exposed and has 1 input parameter named in0. When you click Go, a SOAP request is constructed to invoke the “example” operation and the string “helloworld” is bound to the in0 parameter in the request. The result of the operation is displayed in the Status pane.